
Salads
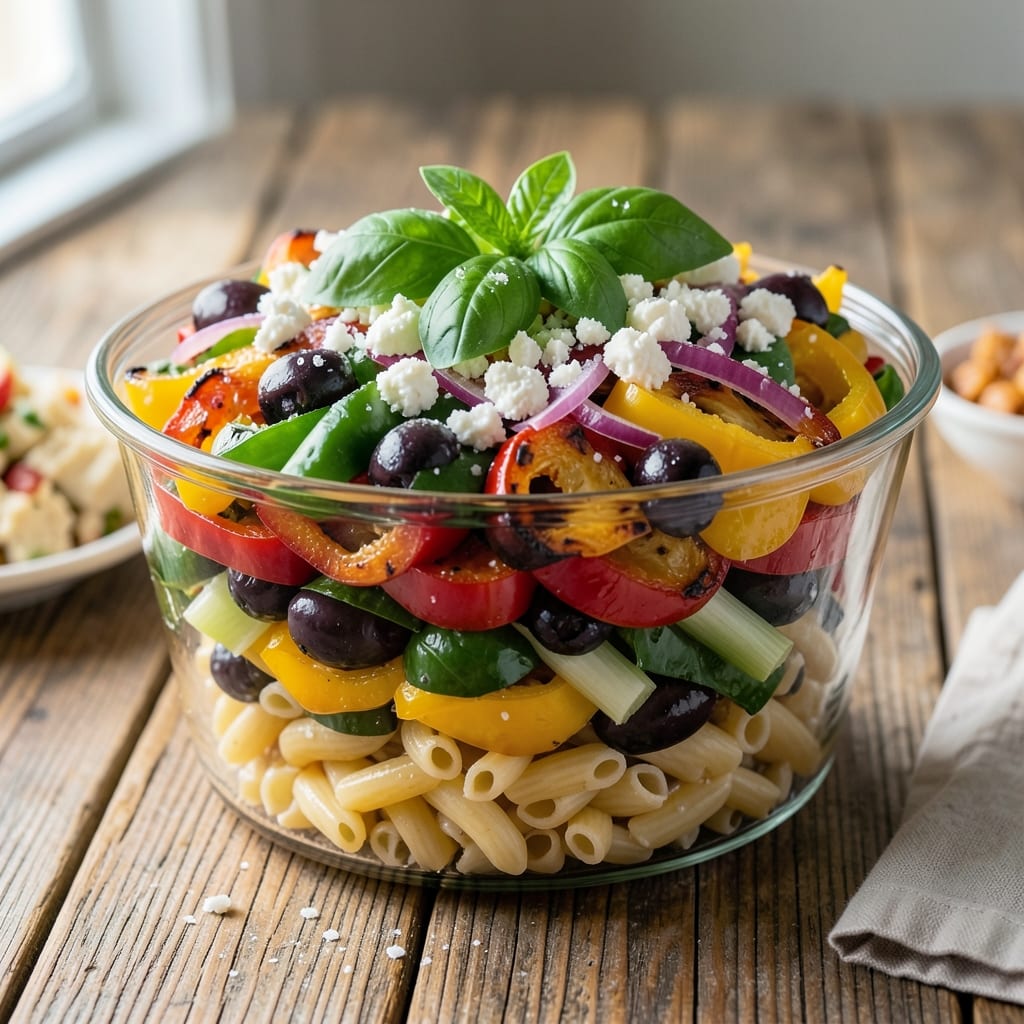
This 7-layer pasta salad delivers restaurant-quality texture and flavor in a showstopping stacked presentation. The secret lies in precise layering—crisp vegetables, creamy dressing, and perfectly cooked pasta all working together for a dish that’s as impressive to serve as it is delicious to eat. I’ve perfected the order and timing to ensure each layer stays distinct while blending harmoniously.
The foundation begins with al dente pasta, tossed in a tangy Italian dressing that coats every strand without making it soggy. Layering starts with the sturdiest ingredients—crunchy peppers and celery—followed by creamy layers of cheese, hard-boiled eggs, and olives, each contributing texture and flavor. The final touch? A sprinkle of fresh herbs that brightens every bite.
What makes this salad truly special is the balance—creamy dressing without overwhelming richness, crisp vegetables that hold their texture, and a structure that keeps each layer intact. It’s the kind of dish that looks as good as it tastes, perfect for potlucks, picnics, or a no-fuss weeknight dinner that feels like a celebration.
Assembling it takes just 30 minutes, and the flavors improve as it sits, making it ideal for meal prep. The key is patience in layering and chilling, ensuring each component stays vibrant and delicious. Let’s build this showstopper layer by layer.
Ingredients for 7 layer pasta salad
Twelve ingredients, seven layers—this showstopper salad balances crisp veggies, creamy cheese, and tangy dressing perfectly.
| Ingredient | Amount | Notes |
|---|---|---|
| Short Pasta (Rotini or Fusilli) 🍝 | 1 ½ lbs | Cooked al dente, drained, cooled |
| Italian Dressing 🫒 | 2 cups | Store-bought or homemade, tangy |
| Bell Peppers (Green, Red, Yellow) 🧅 | 3 whole | Diced, crisp freshness preferred |
| Celery Stalk 🥬 | 4 whole | Thinly sliced, for crunch |
| Red Onion 🧅 | 1 whole | Thinly sliced, sharp flavor |
| Black Olives (Kalamata or Green) 🫒 | 1 cup | Pitted, sliced, for briny bite |
| Hard-Boiled Eggs 🥚 | 6 whole | Sliced, chilled, for creamy texture |
| Shredded Cheddar Cheese 🧀 | 2 cups | Freshly shredded, sharp flavor |
| Fresh Parsley 🌿 | ½ cup | Chopped, for vibrant finish |
| Fresh Basil 🌿 | ¼ cup | Chopped, aromatic touch |
| Diamond Crystal Kosher Salt 🧂 | 1 ½ tsp | For seasoning, adjust to taste |
| Ground Black Pepper 🌶️ | ½ tsp | Freshly ground, for heat |
| Garlic Cloves 🧄 | 4 cloves | Minced, for aromatic depth |
The pasta is your foundation—rotini or fusilli holds dressing best. Cook it al dente (1 minute less than package says), then rinse under cold water to stop cooking. Whole Foods or Trader Joe's carry the best short pasta for this. For veggies, freshness is non-negotiable—bell peppers should be crisp, celery firm, and onions vibrant. I always buy organic when possible, especially for the peppers, since they’re eaten raw. The celery? Look for stalks that are white at the base—those are the freshest. Store all veggies in separate containers in the fridge until ready to chop.
No Italian dressing? Mix 1 cup olive oil, 3 tbsp red wine vinegar, 2 tbsp Dijon mustard, 1 tbsp honey, 1 tsp dried oregano, 1 tsp garlic powder, and 1 tsp onion powder. For olives, Kalamata add Mediterranean flair, while green olives keep it classic. Eggs should be ice-cold when slicing—peel them right before adding to the salad. Cheese matters too: sharp cheddar holds up better than mild varieties. Fresh herbs are ideal, but dried parsley at half the amount works in a pinch. The garlic? Freshly minced makes all the difference—no pre-minced jars here.
This salad tastes even better after 4-6 hours in the fridge, so prep ahead if you can. Store each layer separately in airtight containers to prevent sogginess. The pasta and dressing can be mixed first, then the veggies and other toppings added just before serving. For potlucks, assemble it in the serving dish right before transporting—keeps everything crisp. Leftovers? 3 days max in the fridge, but honestly, it won’t last that long.
Why You'll Love This Recipe
- No-Chop Shortcuts: I swear by the celery and onion combo—just slice once, dump in, and let the dressing do the work. No dicing, no crying over onions, just clean layers every time.
- Crowd-Pleasing Layers: That tangy Italian dressing clings to the rotini like glue, while the bell peppers add a sweet crunch. Honestly, my picky eaters actually finish their plates—colorful layers win every time.
- Meal Prep MVP: Between us, this is my go-to for office lunches or potlucks. Toss it in a container Monday morning, and it stays fresh for days. No reheating, no excuses.
- Budget Brightness: Bell peppers and celery stretch a dollar further than you’d think—plus, the onion adds depth without breaking the bank. My wallet and taste buds both approve.
Step-by-step instructions for chef-style 7 layer pasta salad
The secret to this showstopper salad lies in precise layering and perfect timing. Here's how to build it like a pro.
Cook and Cool the Pasta Foundation
Bring a large pot of salted water to a rolling boil and cook the 1.5 lbs short pasta (rotini or fusilli) according to package instructions until al dente. Drain immediately and rinse under cold water to stop the cooking process. The pasta should be tender but still firm to the bite—this prevents a mushy salad later.
Transfer the drained pasta to a large mixing bowl and toss with 1 tablespoon of the 2 cups Italian dressing. This initial coating prevents the layers from sticking together. Spread the pasta on a baking sheet and refrigerate for at least 30 minutes (or up to 2 hours). Chilling is non-negotiable—it firms up the pasta so it holds its shape when stacked.
Prepare All Ingredients for Layering
While the pasta chills, dice the 3 whole bell peppers (green, red, yellow) into ½-inch cubes and thinly slice the 4 whole celery stalks and 1 whole red onion. Slice the 6 whole hard-boiled eggs into ¼-inch rounds and pat dry with paper towels to remove any surface moisture. Pitted and sliced 1 cup black olives (kalamata or green) should be evenly distributed for visual appeal.
Mince the 4 cloves garlic and set aside. Chop the 0.5 cup fresh parsley and 0.25 cup fresh basil separately—you'll use them for different layers. In a small bowl, combine 1.5 tsp diamond crystal kosher salt and 0.5 tsp ground black pepper for seasoning. This prep work ensures everything is ready to layer efficiently.
Build the Layered Salad Like a Pro
In a large glass or ceramic dish (at least 9x13 inches), spread ⅓ of the chilled pasta as the base. Drizzle with ⅓ of the remaining Italian dressing and sprinkle with ⅓ of the shredded cheddar cheese. Add ⅓ of the sliced bell peppers, ⅓ of the celery, and ⅓ of the red onion. Press down gently to create an even layer.
Repeat this process with the next third of each ingredient, finishing with a final layer of pasta, dressing, cheese, and vegetables. The key is even distribution—no layer should be thicker than the one below it. This ensures every forkful delivers the perfect balance of textures and flavors.
Add the Creamy and Crunchy Layers
Arrange the 6 sliced hard-boiled eggs in a single layer over the vegetables, slightly overlapping them for visual continuity. Sprinkle ½ of the black olives evenly across the top, then drizzle with 2 tablespoons of the remaining Italian dressing. Press down lightly to help the eggs adhere to the salad.
For the final touch, sprinkle the 0.5 cup chopped parsley and 0.25 cup chopped basil over the top. The herbs should be distributed evenly—this adds freshness and vibrant color. Gently press down on the entire salad to ensure all layers are compacted and the dressing penetrates through.
Chill and Serve for Maximum Flavor
Cover the dish tightly with plastic wrap and refrigerate for at least 4 hours (overnight is ideal). This long chilling time allows the flavors to meld and the dressing to fully absorb into the pasta. The salad should be completely chilled before serving—this prevents a watery texture and ensures clean, crisp bites.
When ready to serve, gently run a knife around the edges to loosen the salad from the dish. Use a large spatula to lift it out in one piece if possible, or serve directly from the dish. Each slice should reveal distinct layers—creamy eggs, crunchy vegetables, cheesy pasta, and fresh herbs—making it as beautiful as it is delicious.
Pro Tips For Making 7 Layer Pasta Salad
- Rinse Pasta Cold: Drain your cooked rotini or fusilli and hit it with a quick cold-water rinse—even if the recipe doesn’t say so. This stops the cooking process instantly and keeps the pasta from turning mushy when the dressing gets added later. I learned this after making a batch where the final salad was a sad, sticky mess. ---
- Dice Onions Small: Cut that red onion into 1/8-inch dice, not 1/4-inch chunks. Big pieces stay crunchy and bitey, but they also get soggy fast in the dressing. Tiny dice blend in smoothly and stay crisp longer—trust me, your taste buds will notice. ---
- Layer Dressing Last: Toss the pasta with all the veggies first, then pour the Italian dressing over the top. If you mix it all together upfront, the pasta absorbs too much too soon and turns limp. Adding the dressing last keeps everything bright and crisp—even after sitting in the fridge. ---
- Roast Peppers First: Toss the bell peppers in olive oil, salt, and roast at 425°F for 15 minutes before dicing. The char adds depth, and the skins soften enough to dice cleanly. Skipping this step means you’re left with raw, tough pepper chunks that don’t hold up well in the salad. Worth the extra 15 minutes.
Common mistakes when making this dish
Skipping the Chill
One of the biggest mistakes is serving this salad without proper chilling time. I’ve seen people rush it and serve it immediately after layering, only to end up with a soggy mess. The 4-6 hour chill lets the dressing set and the layers firm up. If you’re short on time, at least 2 hours in the fridge will help—but don’t skip it entirely. The flavors won’t meld properly, and the texture will suffer. 🧊
Uneven Layering
Another common blunder is uneven distribution of ingredients. I’ve seen salads where one side has a mountain of cheese while the other side is bare. To avoid this, divide each ingredient into three equal portions before layering. Use a kitchen scale or measuring cups for precision—especially with the shredded cheese and Italian dressing. Press each layer gently as you go to create an even base for the next one.
Overcooked Pasta
Mushy pasta ruins the entire salad. I can’t stress enough how important it is to cook the pasta al dente and rinse it immediately with cold water. Overcooked pasta absorbs too much dressing and turns mushy when chilled. For 1.5 lbs of short pasta, follow package instructions but pull it out 1 minute early. Rinse under cold water to stop the cooking process completely. This keeps the texture perfect for layering.
Wrong Dressing Choice
Using the wrong dressing can make or break this salad. Some people reach for ranch or Caesar, but those are too heavy and will make the salad greasy. Italian dressing is key—it’s tangy enough to cut through the richness of the cheese and eggs while complementing the vegetables. If you’re making your own, balance the flavors with red wine vinegar and Dijon mustard for that perfect tang. Avoid creamy dressings—they’ll turn the salad into a soggy pile.
Skipping the Herb Finish
The fresh herbs aren’t just for garnish—they add brightness and freshness that ties everything together. I’ve seen people skip them or use dried herbs instead, and the salad just doesn’t have the same pop. Fresh parsley and basil should be sprinkled evenly over the top layer. If you’re using dried herbs, reduce the amount to ¼ of the fresh measurement. The herbs should be visible in every bite for that restaurant-quality finish. 🌿
Not Pressing Layers
Many people assume that layering is just about piling ingredients on top of each other, but pressing each layer is crucial. After adding each third of the ingredients, press down gently with your hands or a spatula. This compacts the salad and helps the dressing penetrate evenly. Without pressing, the layers won’t hold together, and the salad will fall apart when sliced. Think of it like building a sandcastle—each layer needs to be packed down for stability.
Nutrition facts
Frequently asked questions
Can I make this pasta salad ahead of time?
This salad tastes even better after 4-6 hours in the fridge. Store each layer separately in airtight containers to prevent sogginess. Assemble it in the serving dish right before serving for the crispiest texture. For potlucks, transport the layers separately and build it in the dish at your destination.
What if I don't have Italian dressing?
No problem! Mix 1 cup olive oil, 3 tbsp red wine vinegar, 2 tbsp Dijon mustard, 1 tbsp honey, 1 tsp dried oregano, 1 tsp garlic powder, and 1 tsp onion powder for a homemade version. The tangy balance is key—avoid creamy dressings like ranch, which can make the salad too heavy.
How do I keep the layers from getting soggy?
Chilling is your best friend! Press each layer gently as you build, then refrigerate uncovered for 1 hour to let moisture evaporate before covering. For extra insurance, pat all veggies and eggs dry with paper towels before assembling. The 4-6 hour chill helps the dressing set properly without sogginess.
Can I substitute any ingredients?
Yes, but choose wisely! Swap bell peppers for cucumber or zucchini, or use mozzarella instead of cheddar for a milder flavor. For a vegetarian version, omit the eggs and add chickpeas or marinated artichokes. Keep the pasta shape short (rotini/fusilli) to maintain texture. The key is balancing textures—crunchy, creamy, and chewy elements should all be present.
How do I serve this salad for a crowd?
Use a 9x13-inch glass dish for easy slicing. Assemble it in the serving dish, then refrigerate until ready to serve. Slice with a long serrated knife—run it around the edges first to loosen the salad. For buffet-style serving, use a large platter and arrange slices in a fan shape. Garnish with extra herbs and olives for presentation.