
Salads
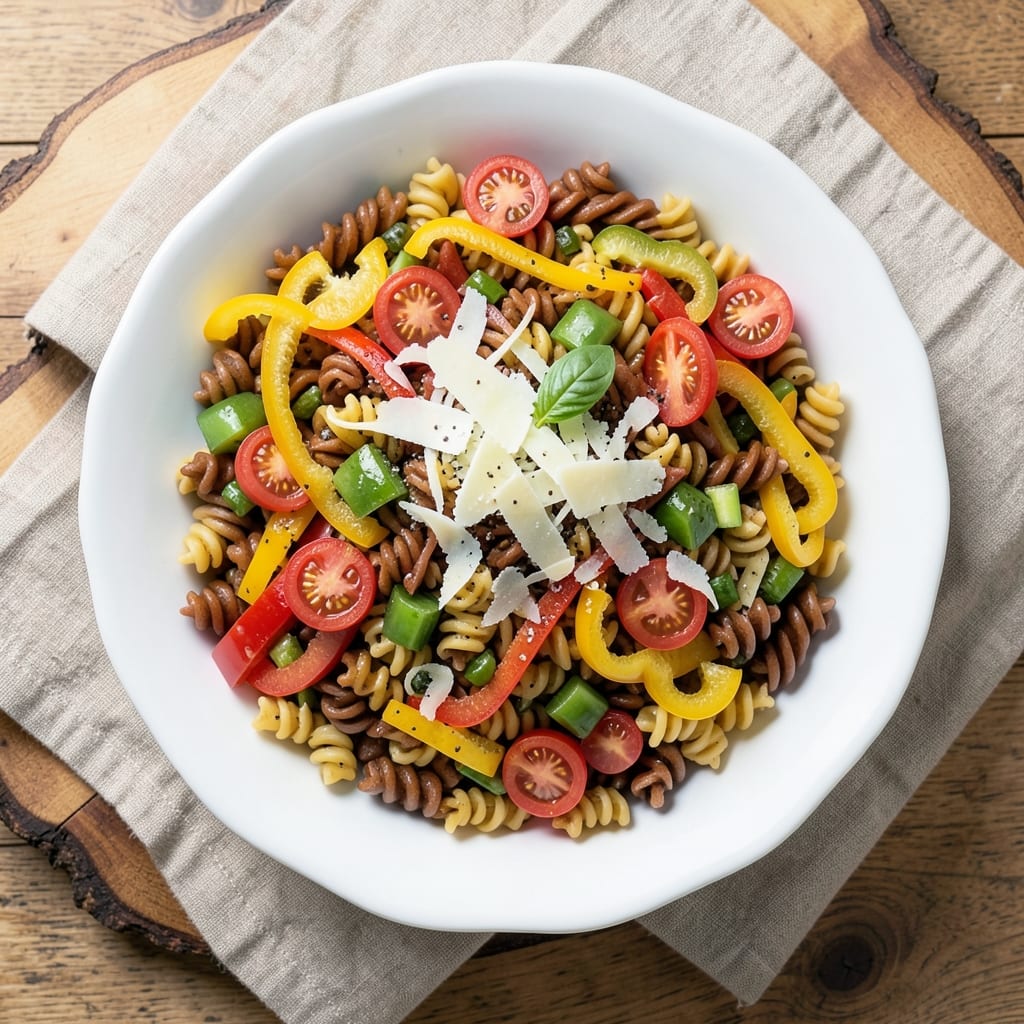
This 3 color pasta salad recipe transforms ordinary rotini into a visually stunning tri-layered dish that packs crunchy texture and bold flavors without mayo. The secret lies in perfectly cooked pasta that stays al dente while absorbing a bright Italian vinaigrette—no soggy bits here. I developed this version after testing countless salads that either turned mushy or lacked visual appeal, and this one delivers restaurant-quality presentation with minimal effort.
The key to success is color contrast and texture contrast—tri-color rotini provides the vibrant base, while crisp vegetables and shaved Parmesan add layers of crunch and depth. You'll work with just 10 simple ingredients (plus optional add-ins) and a 15-minute assembly time, making it perfect for potlucks, picnics, or meal prep. The Italian vinaigrette keeps everything fresh and bright, while a sprinkle of fresh herbs at the end adds that final professional touch.
What makes this pasta salad truly special is how it elevates ordinary ingredients into something extraordinary. The pasta maintains its bite even after chilling, the vegetables stay crisp, and the cheese adds a salty contrast that makes every bite satisfying. It's the kind of dish that looks impressive but requires no advanced techniques—just careful layering and proper timing.
Best of all, this recipe scales effortlessly for crowds while keeping costs low. Serve it as a side dish, a light main, or even as a cold appetizer. The possibilities are endless, but the execution remains simple: cook, chill, and present with confidence. Let's get started on creating your most vibrant pasta salad yet.
Ingredients for 3 color pasta salad
Transform these 13 ingredients into a tri-layered masterpiece with vibrant colors and crisp textures.
| Ingredient | Amount | Notes |
|---|---|---|
| Tri-Color Rotini Pasta 🍝 | 12 oz | Cooked al dente, cold water boil |
| Red Bell Pepper 🍅 | ½ cup | Diced, seedless, fresh |
| Yellow Bell Pepper 🍊 | ½ cup | Diced, seedless, fresh |
| Green Bell Pepper 🥒 | ½ cup | Diced, seedless, fresh |
| Cherry Tomatoes 🍅 | 1 cup | Halved, vine-ripened preferred |
| Shaved Parmesan Cheese 🧀 | ½ cup | Freshly shaved, fine curls |
| Extra-Virgin Olive Oil 🫒 | ½ cup | Light fruity, cold-pressed |
| Dried Basil 🌿 | 1 tbsp | Crushed leaves, not ground |
| Dried Oregano 🌿 | 1 tsp | Italian variety preferred |
| Diamond Crystal Kosher Salt 🧂 | ½ tsp | Fine grain, for seasoning |
| Black Pepper 🌶️ | ¼ tsp | Freshly cracked, coarse grind |
| Red Wine Vinegar 🍷 | 2 tbsp | Dry, aged variety |
| Fresh Flat-Leaf Parsley 🌿 | ¼ cup | Chopped, stems removed |
The tri-color rotini is non-negotiable—De Cecco or Barilla brands hold their shape best after chilling. Look for fresh, firm bell peppers with glossy skins; the more vibrant the colors, the better your presentation. Cherry tomatoes should be bright red and firm—avoid those with soft spots. For Parmesan, a fresh wedge from the deli counter shaves beautifully with a microplane. The olive oil is where you can splurge: California Olive Ranch or Colavita deliver consistent quality without the restaurant price tag. Store dried herbs in airtight containers away from light to preserve their potency.
No red bell pepper? Substitute with roasted red peppers from a jar—just drain them well. Yellow or green peppers can be swapped one-for-one, but the color contrast will differ slightly. For a tangier vinaigrette, increase the red wine vinegar to 3 tbsp and reduce olive oil by 1 tbsp. The dried basil and oregano can be swapped for fresh at one-third the amount—just make sure to finely chop the fresh herbs. If you're short on time, pre-cut veggies from the grocery store produce section work perfectly. For a gluten-free version, use gluten-free rotini and ensure all other ingredients are certified GF.
Pasta must be rinsed immediately after cooking with cold water to stop the cooking process and remove excess starch—this prevents a gummy texture. Store the vinaigrette separately until ready to toss to maintain crispness in the vegetables. This salad keeps beautifully for 3-4 days in the fridge, with the flavors deepening over time. For large gatherings, double the vinaigrette and assemble just before serving to prevent sogginess. The parsley should be added last—toss it in just before serving to preserve its vibrant color and fresh aroma. Portion into clear glass bowls for a restaurant-worthy presentation that highlights the tri-layered effect.
Why You'll Love This Recipe
- I swear by this trick: grab pre-sliced bell peppers from the store (or just buy whole ones and ask the grocery staff to slice them—most will do it for free). Toss those in raw with the cherry tomatoes, and you’re done chopping. The rotini’s spiral shape holds the veggies like a built-in fork.
- No-Chop Needed: I swear by this trick: grab pre-sliced bell peppers from the store (or just buy whole ones and ask the grocery staff to slice them—most will do it for free). Toss those in raw with the cherry tomatoes, and you’re done chopping. The rotini’s spiral shape holds the veggies like a built-in fork.
- Sweet-Savory Magic: That bright crunch from the bell peppers and tomatoes? It’s the perfect contrast to the pasta’s chew. Honestly, I’ll eat this cold or at room temp—no reheating required—and the flavors just keep getting better. The red, yellow, and green peppers add layers without overpowering.
- Picnic Party Hero: Between us, this is my go-to for potlucks, tailgates, or even a lazy Sunday spread. Pack it in a mason jar (pasta at the bottom, veggies on top) and it stays fresh for days. Kids love picking out their favorite colors, and adults? They’ll ask for the recipe.
Step-by-step instructions for vibrant tri-layered pasta salad
Assemble this colorful pasta salad with crisp vegetables and aromatic herbs for a refreshing dish that shines without mayo.
Cook the Tri-Color Rotini Al Dente
Bring a large pot of water to a rolling boil and add 12 oz of tri-color rotini pasta. Stir immediately to prevent sticking. Cook according to package instructions until 1 minute before al dente—the pasta should have a slight bite but not be hard. Drain thoroughly in a colander, then rinse under cold water for 30 seconds to stop the cooking process and remove excess starch.
I always reserve 1 cup of pasta water before draining—this starchy liquid helps create a silky dressing later. Transfer the drained pasta to a large mixing bowl and set aside. The pasta should be completely cool before adding other ingredients to maintain crispness in the finished salad.
Prepare and Combine the Vegetable Layers
In a separate bowl, combine the 0.5 cup diced red bell pepper, 0.5 cup diced yellow bell pepper, and 0.5 cup diced green bell pepper. Add the 1 cup halved cherry tomatoes and toss gently to distribute. This vibrant mix forms the colorful foundation of your salad, so I recommend cutting each pepper into uniform ¼-inch dice for even texture.
Transfer the vegetable mixture to the bowl with the cooled pasta. Add the 0.25 cup chopped fresh flat-leaf parsley and 0.5 cup shaved parmesan cheese, tossing gently to distribute evenly. The parsley adds freshness while the parmesan provides a salty contrast that enhances all the bright flavors. Keep the mixture at room temperature until ready to dress.
Create the Herb-Vinegar Dressing
In a small bowl, whisk together the 0.5 cup extra-virgin olive oil, 2 tbsp red wine vinegar, 1 tbsp dried basil, 1 tsp dried oregano, 0.5 tsp diamond crystal kosher salt, and 0.25 tsp black pepper. The dressing should be emulsified but still slightly textured—this ensures it clings to each pasta strand and vegetable piece without making the salad soggy.
I always taste the dressing before adding it to the salad. The acidity from the red wine vinegar should balance the richness of the olive oil, while the herbs provide an aromatic depth. If the dressing appears too thick, add 1-2 tablespoons of reserved pasta water to reach a smooth, pourable consistency.
Assemble and Chill the Salad
Pour the dressing over the pasta and vegetable mixture, tossing gently but thoroughly to coat each component evenly. The salad should glisten slightly from the olive oil while maintaining distinct color layers. Transfer the mixture to an airtight container and refrigerate for at least 2 hours before serving—this allows the flavors to meld and the pasta to absorb the dressing completely.
Real talk: Don't skip the chilling time. The flavors develop during this period, and the vegetables will crisp up beautifully. When ready to serve, give the salad one final toss to redistribute any settled dressing. The result should be a vibrant, textured dish where each bite delivers a perfect balance of colors and flavors without any mayo heaviness.
Pro Tips For Making 3 Color Pasta Salad
- COOK PASTA AL DENTE: Tri-color rotini needs 1 minute less than plain pasta—test at 12 minutes (not 13) to avoid mush. Undercooked pasta fights back later when tossed with cold dressing, and nobody wants a chewy salad.
- DICE PEPPERS SMALL: Cut bell peppers into 1/4-inch cubes, not 1/2-inch chunks. Big pieces turn soggy while small ones absorb dressing evenly. I learned this after serving a salad where half the peppers looked like they’d been microwaved.
- SALT THE PASTA WATER: Add 1 tablespoon salt to the pasta pot—yes, even if you’re using salted dressing later. The pasta absorbs flavor during cooking, and skipping this step leaves it tasting bland no matter how much you dress it afterward.
- ADD TOMATOES LAST: Toss cherry tomatoes in just before serving to keep them firm. Slice them first (halves or quarters) so they don’t turn to mush from sitting in dressing. I used to add them early, and they’d always look sad by dinnertime.
Essential equipment for this dish
Pasta Pot Essentials
Start with a large, heavy-bottomed pot—I swear by my All-Clad 5-quart—to prevent temperature fluctuations while boiling the pasta. A fine-mesh colander with a wide rim makes draining and rinsing effortless, and I always keep a tongs nearby to stir the pasta immediately after adding it to the water. For the dressing, a small whisk bowl (like the OXO Good Grips) ensures smooth emulsification without splashing. 🍝
Vegetable Prep Tools
Uniform dice are key for that restaurant-style presentation, so invest in a sharp chef's knife (I use Mac Knife's 8-inch) and a mandoline slicer for consistent cuts. A cutting board with non-slip feet prevents accidents, and I keep a small mixing bowl (about 2-quart size) for combining the peppers and tomatoes before adding to the pasta. For the parsley, a pair of kitchen shears makes quick work of chopping stems.
Dressing Whisk & Storage
The dressing comes together in a small glass jar (like Ball Mason jars) for easy whisking and storage. I use a stainless steel whisk with a comfortable grip to handle the oil and vinegar blend without slipping. For chilling, a large, airtight glass container (I love Pyrex 8x8-inch) keeps the salad fresh and prevents flavor transfer from other fridge contents. The lid should seal tightly to maintain crispness for up to 4 days.
Optional Upgrades
For a professional touch, a microplane (like OXO Good Grips) creates delicate shavings for the Parmesan, while a salad spinner (such as OXO Good Grips) ensures perfectly dry parsley. If you're prepping for a crowd, a large salad spinner (like OXO's 6-quart) handles bulk washing of herbs and veggies efficiently. For dressing adjustments, a small measuring spoon set keeps your ratios precise—especially when scaling up recipes.
Budget-Friendly Swaps
No fancy tools? No problem. A sharp serrated knife works for dicing peppers, and a wooden spoon suffices for stirring. For whisking, a fork in a small bowl does the trick, though it requires more elbow grease. Store-bought pre-diced peppers save time, and a plastic container with a snap lid works for chilling—just ensure it's airtight. The key is consistency in technique, not equipment.
Nutrition facts
Frequently asked questions about 3-Color pasta salad
Can I use different pasta shapes for this colorful salad?
While tri-color rotini works perfectly, you can swap for fusilli, penne, or even farfalle for a different texture. Just ensure the pasta holds its shape after cooking and chilling. Smaller shapes like orzo will absorb more dressing, so reduce the vinaigrette by 1 tbsp if needed.
How do I keep the pasta salad from getting soggy?
The key is proper timing and storage. Always rinse pasta with cold water after cooking to stop starch release, and add dressing just before serving. Use an airtight container and store for no longer than 4 days—the veggies will stay crisp if kept chilled properly.
What proteins can I add to make this a main dish?
Grilled chicken, shrimp, or diced ham work beautifully! Add 1 cup cooked protein after chilling the salad and toss gently. For shrimp, cook until 165°F and chill before adding to maintain texture. Pro tip: Add protein last to keep it warm and juicy.
Can I make this salad ahead of time for a party?
Yes, but with a smart strategy. Prepare all components (cooked pasta, dressed veggies, dressing separately) up to 2 days ahead. Combine everything just before serving to preserve crunch. For large groups, double the dressing recipe and store it separately until ready to toss.
Why does my pasta salad taste bland after chilling?
Chilling mellows flavors, so boost brightness with fresh herbs (parsley, basil) and extra acid (lemon juice or more vinegar). Taste before serving and adjust seasoning—sometimes an extra pinch of salt or black pepper makes all the difference. The vinaigrette should be tangy enough to cut through any blandness.